


Decorated, gorgeous, and absolutely worth giving a try. These cookies are not just a crowd-pleaser but are adored by kids like you can not even imagine. Everybody feels confused about whether to eat it or use it as a Christmas decoration.
The cookies are quick, eggless, and vegan vanilla butter cookies. And the royal icing is also vegan which I made using Aquafaba and powdered sugar. You don’t need any egg whites and still you get that same texture and that shine with this vegan royal icing.
Story Time
I wanted to share these cookies last year but at that time I was very much intimidated to even try these cookies. I was also in India at that time and visited our family there. There I did not have much work to do so I decided to at least start with piping practice. That is the key to making these cookies. I started with mehndi (henna) cones that are very easily available in every store in India. I bought a couple of packs and started practicing on a piece of paper. Undoubtedly, it was not easy. It was breaking. I was not getting the straight lines and did not know how much pressure to apply. But I kept on going until I figured that out. I got my mom’s genes. She is very creative and artistic. I guess that is why I learned it pretty fast 🙂
This year when the Christmas season arrived, I decided to attempt it again using real ingredients. I did some reading, watched youtube videos, and here I am, sharing my first attempt to decorate Christmas cookies using vegan royal icing. Trust me, it is not as difficult as it seems. Just practice and have patience.
Tips to bake the cookies perfectly
- Sifting: Sifting dry ingredients is very important. Sometimes your sugar or flour contains some tiny lumps which are unnoticeable. And it gets difficult to form a smooth dough if they have any lumps.
- Room temperature ingredients: Make sure all the ingredients are at room temperature. We do not want extra soft or hard butter for the recipe. Take the butter out 10 to 15 minutes before baking.
- Refrigerating the dough: If the dough seems very soft to roll (or after rolling), refrigerate it for 25 to 30 minutes.
How is the cookie texture?
These cookies are buttery soft but tender enough to hold the shape and take a nice bite. These are not soft and chewy. You take a bite and it just melts in your mouth. These cookies don’t puff up or increase in size because there is no baking powder or baking soda in them.
What is Royal Icing?
Royal icing is basically a mixture of egg whites and powdered sugar. These two ingredients are whisked until they become light, fluffy and shiny. To make vegan royal icing, we use Aquafaba instead of egg whites. It gives the same texture and shine that you get with egg whites.
How do we make Royal Icing?
There are two (or three) main types of royal icing – outline consistency icing and flowing consistency icing. There is one more type of consistency that is used to make extensive designs like flowers, etc. We are leaving that one for this recipe.
Making royal icing is quite simple but tricky. If you don’t get the right consistency, you won’t be able to pipe well. Too flowy, and will fall all over the place. Too stiff, and it would be very difficult to outline. But do not worry. I got your back 🙂
- Whisk Aquafaba and lemon juice in a stand mixer (using the whisk attachment) until it is slightly frothy. It would take around 1 to 2 minutes at medium speed. You can even do this with a hand mixer.
- Add salt and sugar in parts. Do not add all the sugar at once. Whisk at medium-high speed until it becomes fluffy, and light and you get stiff peaks. Do not over-mix. We do not want to incorporate excess air.
Always make outline consistency icing first and then divide it to add colors and adjust the liquid to make flowing consistency icing.
What are the types of Royal Icing?
Below are two types of royal icing needed for the recipe:
- Outline Consistency Icing: This icing is needed to make the outlines. The outline prevents the icing from flowing out. To check, see if you get the soft peaks after whisking. You can even drop a line of icing in the mixing bowl and if it holds the shape and doesn’t merge with the icing in the bowl, it is perfect for piping outlines.
- Flowing Consistency Icing: This icing is needed to fill the cookie space. The consistency should be just right so that it can flow easily without applying too much pressure. To make this, add a few drops of Aquafaba or water to the outline icing and mix well. Drop it in the bowl of icing and count to 20. If it merges with the icing, it is perfect for piping. Do this step after mixing the color because the color also contains liquid. We do not want extra flowy icing.
Steps to make Royal Icing
- Whisk Aquafaba with lemon juice at medium speed until frothy.
- Add salt and sugar in parts. Whisk until light, fluffy and you get soft peaks that don’t merge with the icing in the bowl. That’s outline consistency icing.
- Take some out in a piping bag.
- Divide the rest of the icing into separate bowls to mix colors.
- Add colors and mix well. Do not over-mix because it will add excess air to the icing.
- Fill some part of the colored icing in piping bags for outlining.
- Add a few drops of Aquafaba or water to the remaining icing and mix well. Drip the icing to the bowl and count to 20. If it merges with the icing, the consistency is just right for flowing consistency icing.
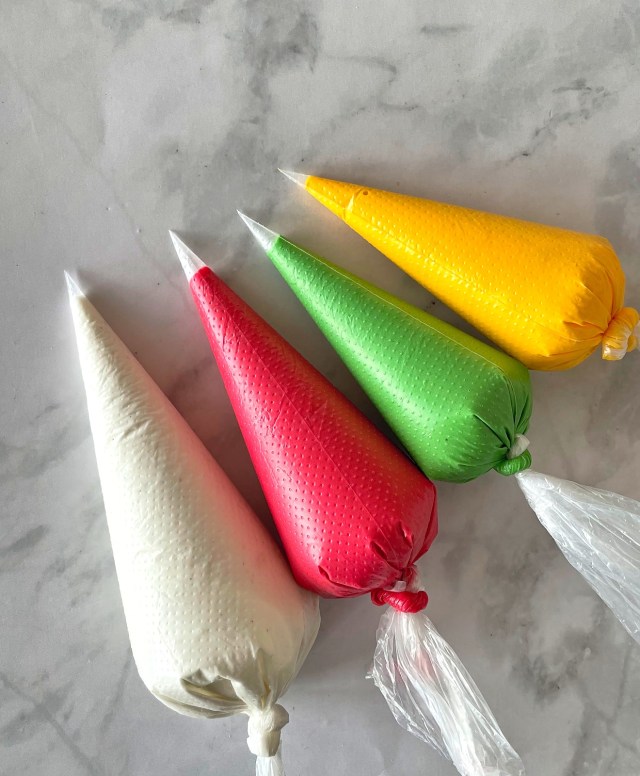
Mark each piping bag otherwise it may confuse which one is which. It happens 🙂
How to store these cookies?
You can put these cookies in an air-tight container and leave them on the counter for up to 7 days. But it also depends on the temperature of the place you are living in.
I live in Munich, Germany and the weather here is quite cold – 0 degrees Celsius or below. But the room temperature is not that cold. I kept them on the kitchen counter and they lasted for more than 7 days. They didn’t stale. I kept them in an air-tight container.
More cookies – just as good
- 3-Ingredients Cinnamon Puffs (Vegan Palmiers)
- Chocolate Filled Butter Cookies
- 100% Whole Wheat Gingerbread Cookies
- 1 Dough, Many Cookies – Butter Almond Cookies
Now grab all the ingredients because you are ready to make these tempting and gorgeous Christmas cookies at home. It is perfect to make in this festive season and grab all the attention and appreciation.
If you try this recipe & like it too, please share the photo of your creation on Instagram and tag us @thefearlesscooking. We just love to see your recreation of our recipes.
Happy Baking & Merry Christmas.
Love from us
Richa


Tell us what you think